Creating a multi-arch K8 cluster - Part 4 - Setup a load-balancer and NFS

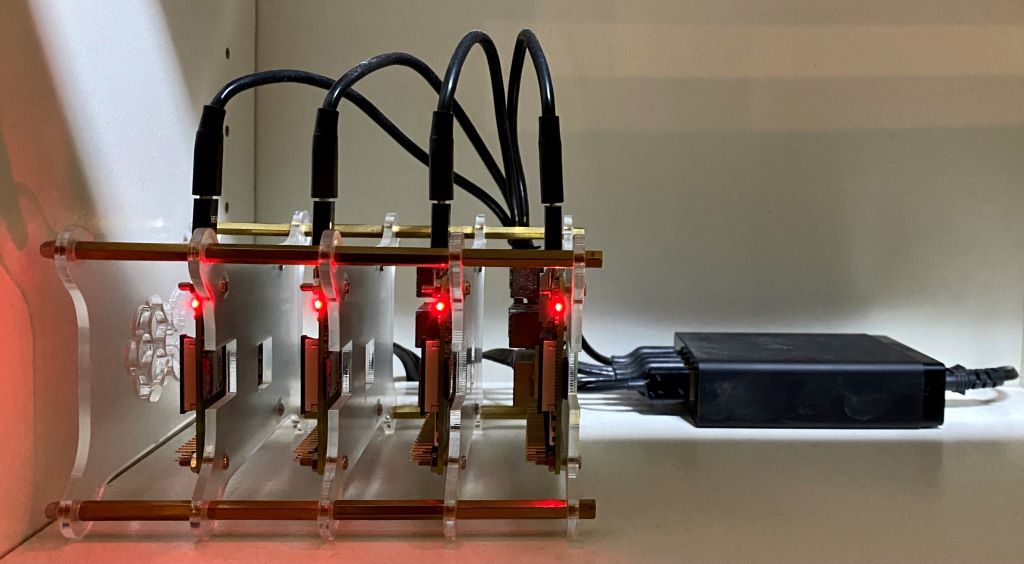
After part 3 of this blog series we have a fully working Kubernetes cluster.
Load-Balancer
It has one major drawback: All exposed ports of running pods/services are only reachable under the specific worker node IP address. In a real cluster a load-balancer would handle all incoming traffic and route it to the appropriate Kubernetes objects. In best case the cloud provider offers that load-balancer integration for Kubernetes service type LoadBalancer.
In the own Kubernetes cluster another solution is needed. A well-known alternative is the software based Layer 2 load-balancer called MetalLB.
In a few words - what it does:
It uses Layer 2 (ARP mode) to make an IP address reachable in the internal network. Beside the 4 IP addresses the Raspberry Pi's already have, the load-balancer offers another independent IP address in the same subnet.
A Kubernetes service exposed as type LoadBalancer will be reachable under that IP address independently from the physical node where a pod is running in the cluster. - So just like a real load-balancer.
If you want to set it up by your own, follow the guide on the MetalLB homepage.
I prefer an easier way using a ready-to-go helm chart and a simple configuration file.
First step is to install helm as a tool on the local environment. There are a lot of different options for that on the Helm homepage.
The easiest way on Linux (f.e.: WSL ) is to execute the install script which will always pull the latest version:
curl -fsSL -o get_helm.sh https://raw.githubusercontent.com/helm/helm/master/scripts/get-helm-3
chmod 700 get_helm.sh
./get_helm.sh
We will use the helm repo from MetalLB which provides a chart for MetalLB. At first add the helm chart repo to the local helm:
helm repo add metallb https://metallb.github.io/metallb/
Now we create a an adapted helm configuration file (values.yaml) for the cluster which could look like this:
configInline:
  address-pools:
    - name: default
      protocol: layer2
      addresses:
- 192.168.1.245-192.168.1.249Pay attention to the IP address range in the values.yaml example. This are the adresses the LoadBalancer will offer. Adapt this to your personal needs!
Expecting that your local KUBECONFIG file points to the cluster configuration and the cluster is reachable from your local environment the installation of MetalLB will be a simple:
kubectl create namespace cluster-system
helm install metallb metallb/metallb -n cluster-system -f values.yaml
The first line will create a new namespace cluster-system. All cluster relevant system resources in this guide will be installed to that namespaces. This way we don't modify the internal kube-system namespace but keep cluster relevant extension away from the default namespace and prevent chaos.
MetalLB will install a speaker container on every node and a controller on one node - this can be watched by executing:
watch kubectl get pods -n cluster-system

Now the cluster is ready for Kubernetes services of type LoadBalancer.
NFS with dynamic volume provisioning
Next thing is to store data on a central location. For that purpose Kubernetes provides a lot of storage-classes. Storage classes are only one side of the medal, the other side is having also a dynamic volume provisioning to create and delete volumes on demand.
This guide describes that for NFS with a Synology NAS. QNAP offers a similar option with NFS.
Open the "System settings" in the Synology Management UI and navigate to "File Services". Check that the option "Enable NFS" is enabled in tab "SMB/AFP/NFS". and go to "Shared folder" settings.
Create a new shared folder, give it a simple name like "k8storage" and in the next dialog deactivate the "Trash can" option and activate the option to hide the shared folder in the network environment.
Now the select the shared folder from the list and click "Edit". In the "NFS permissions" tab add the IP addresses of all Rasperry PI's/Nodes in the Kubernetes cluster. For every IP the following options must be set:
- Privilige: read/write
- Asynchronous access: enabled
- Squash: No mapping
- Security: AUTH_SYS
- Allow connections from non-priviliged ports: true
- Allow users to access mountes sub-folders: true
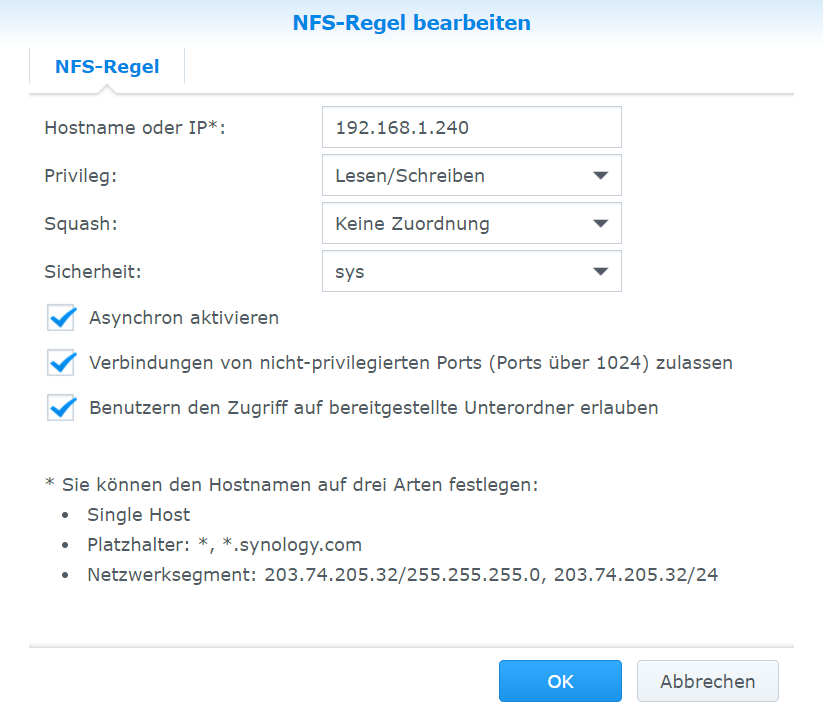
After this configuration the central NAS setup is prepared.
Make sure that the nfs-common package is installed on all nodes in the Kubernetes cluster, like described in Part 3.
To install the NFS client provisioner with helm we need a configuration file - here is an example of a simple working values.yaml configuration:
fullnameOverride: nfs-client-provisioner

nodeSelector:
  kubernetes.io/arch: arm64

strategyType: Recreate

storageClass:
  name: nfs-storage
  defaultClass: true
  archiveOnDelete: true
  allowVolumeExpansion: true
  provisionerName: storage.provisioner/nfs

nfs:
  server: <ip-address-of-the-nas>
  path: /volume1/<nfs-storage-name>
Explanation:
It will install the ARM64 Docker image variant of the nfs-client provisioner and define a default storage class name "nfs-storage". All deleted Kubernetes volumes will not physically deleted from the NAS but archived (archiveOnDelete).
Don't forget to replace the NFS IP address and the storage name with the one prepared above.
Next we need to add the helm repo for the nfs-subdir-external-provisioner. Unfortunately the original chart is deprecated and the implementation of the provisioner was moved to a new Git repository and links back to the deprecated helm chart. - A loop - that look like a bit of a mess until the moved Git repo is up-to-date.
So I decided to build my own helm charts that pay attention on usage in K8 clusters with mixed architecture and rely on the original Docker images. If you are interested to contribute or use them - take a look at: groundhog2k/helm-charts
Add the repo and install the nfs-subdir-external-provisioner with two simple commands:
helm repo add nfs-subdir-external-provisioner https://kubernetes-sigs.github.io/nfs-subdir-external-provisioner/

helm install nfs nfs-subdir-external-provisioner/nfs-subdir-external-provisioner -f values.yaml -n cluster-system
On one of the ARM64 worker nodes a pod nfs-client-provisioner-* should have been started. Check it with kubectl get pods -n cluster-system | grep nfs
To test the NFS client provisioner, let's create a PersistentVolumeClaim in a file nfs-test.yaml:
apiVersion: v1
kind: PersistentVolumeClaim
metadata:
  name: test-nfs
  labels:
    app.kubernetes.io/name: test
    app.kubernetes.io/instance: test
spec:
  accessModes:
    - ReadWriteOnce
  volumeMode: Filesystem
  resources:
    requests:
      storage: 64Mi
Deploy this PVC with kubectl apply -f nfs-test.yaml.
Check if a volume was created: kubectl get pv
Remove the PVC: kubectl delete -f nfs-test.yaml
The volume should be vanished.
A glimpse into the shared NFS folder using the NAS management UI should present a folder with a prefix archived- in the name.
Now we have a Kubernetes cluster with a Load-balancer and a central NFS storage system.
In Part 5 of the series a x86/AMD64 worker node will be added to get closer to the goal of a Kubernetes cluster with mixed-architecture.